在microservice-student-provider-1001子模块项目的基础上修改
修改pom.xml
加上eureka客户端依赖
1
2
3
4
5
6
7
8
9
|
<dependency>
<groupId>org.springframework.cloud</groupId>
<artifactId>spring-cloud-starter-eureka</artifactId>
</dependency>
<dependency>
<groupId>org.springframework.cloud</groupId>
<artifactId>spring-cloud-starter-config</artifactId>
</dependency>
|
修改application.yml
直接添加下面代码
1
2
3
4
5
6
7
8
9
| eureka:
instance:
hostname: localhost
appname: microservice-student
instance-id: microservice-student:1001
prefer-ip-address: true
client:
service-url:
defaultZone: http://localhost:2001/eureka
|
在启动类加上@EnableEurekaClient注解
1
2
3
4
5
6
7
8
9
10
11
12
13
14
15
16
17
18
19
20
21
22
23
| package com.ledao;
import org.springframework.boot.SpringApplication;
import org.springframework.boot.autoconfigure.SpringBootApplication;
import org.springframework.boot.autoconfigure.domain.EntityScan;
import org.springframework.cloud.netflix.eureka.EnableEurekaClient;
@EnableEurekaClient
@SpringBootApplication
@EntityScan("com/ledao/entity")
public class StudentProviderApplication_1001 {
public static void main(String[] args) {
SpringApplication.run(StudentProviderApplication_1001.class, args);
}
}
|
测试
分别启动microservice-student-provider-1001和microservice-eureka-server-2001子模块项目
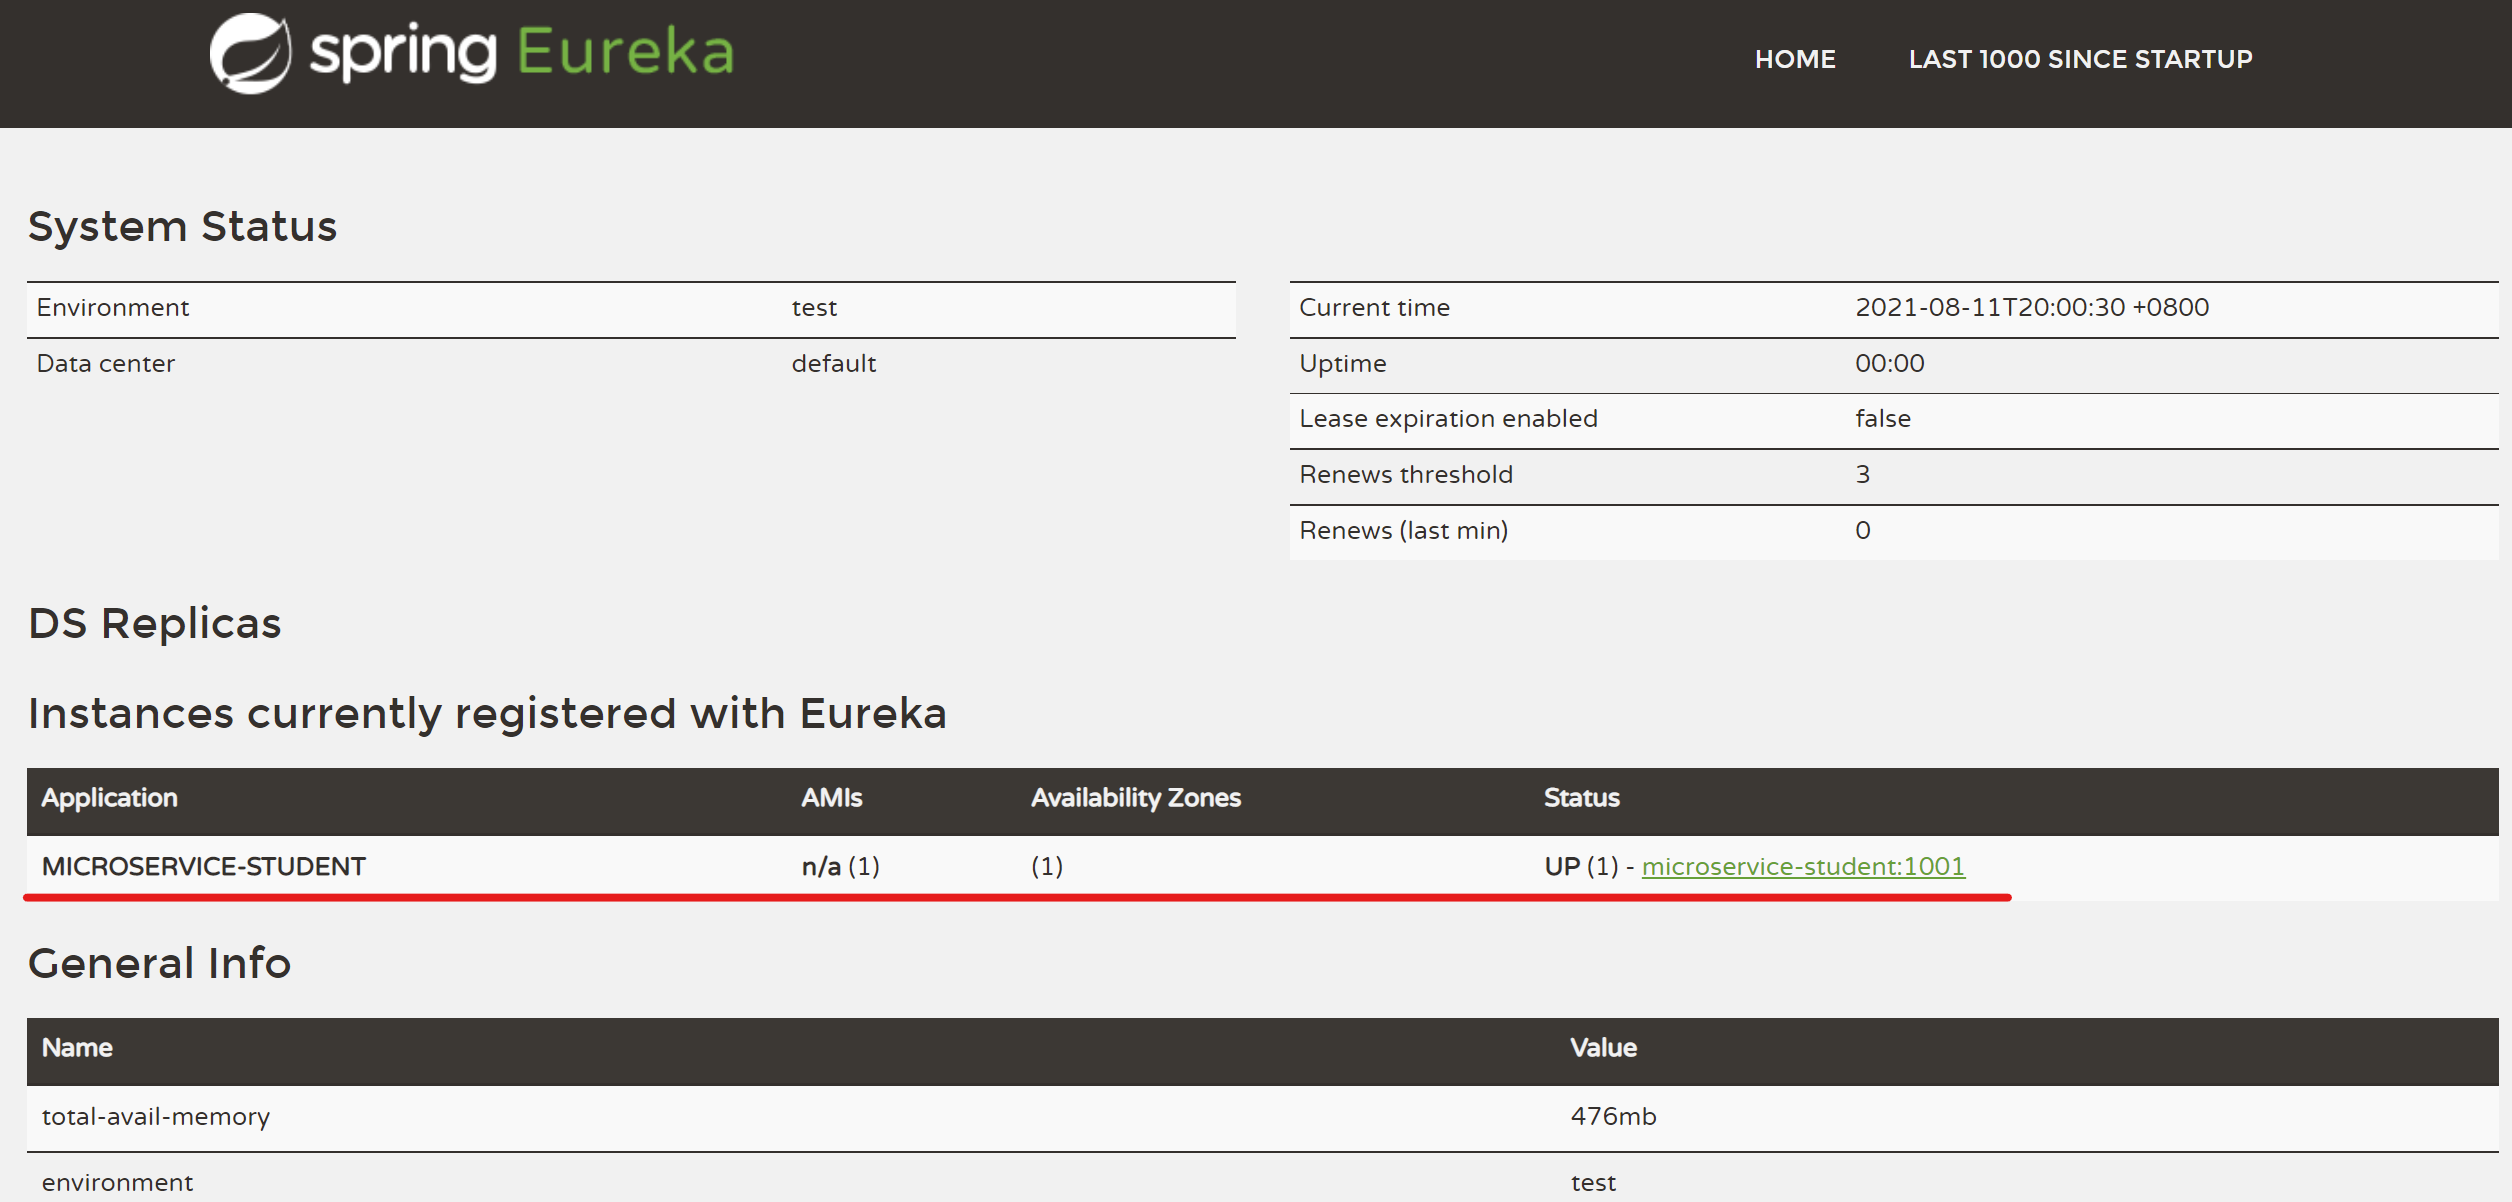
浏览器地址栏输入 http://localhost:2001/ ,Eureka服务注册中心出现了划红线处的服务

配置info信息
作用
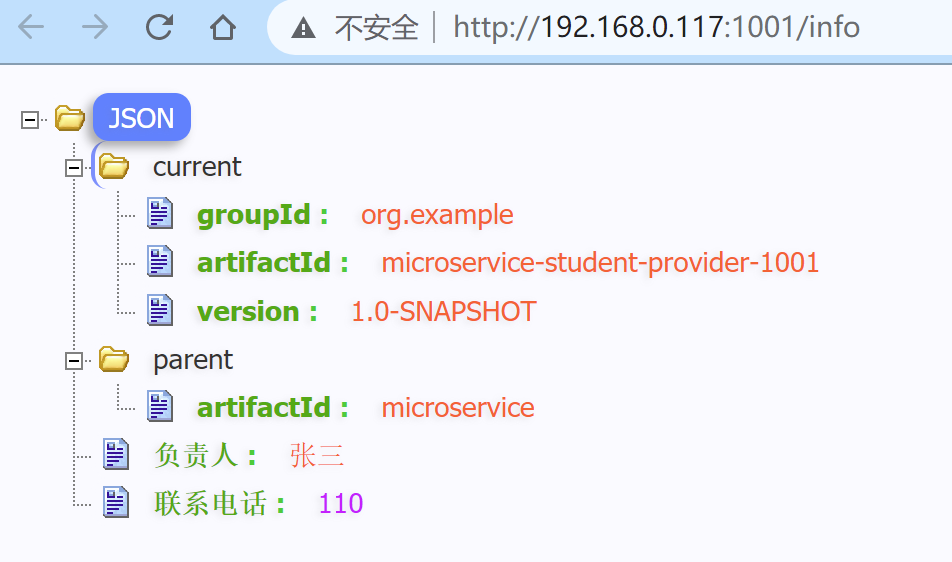
点击上图的划红线处的链接可以查看一些信息,比如:该服务的groupId、artifactId、version,继承的artifactId、该服务的负责人和电话
配置过程
在服务提供者项目pom.xml里加入actuator监控依赖:
1
2
3
4
5
|
<dependency>
<groupId>org.springframework.boot</groupId>
<artifactId>spring-boot-starter-actuator</artifactId>
</dependency>
|
在父项目pom.xml里的build节点加入:
1
2
3
4
5
6
| <resources>
<resource>
<directory>src/main/resources</directory>
<filtering>true</filtering>
</resource>
</resources>
|
在服务提供者项目application.yml加上info配置:
1
2
3
4
5
6
7
| info:
current.groupId: @project.groupId@
current.artifactId: @project.artifactId@
current.version: @project.version@
parent.artifactId: @project.parent.artifactId@
负责人: 张三
联系电话: 110
|
结果


