前提
已经搭建好RabbitMQ基本环境,搭建步骤查看博客:搭建RabbitMQ基本环境
项目结构

实现过程
application.yml配置
添加一个application.yml配置文件,内容如下:
1
2
3
4
5
6
7
8
9
10
| server:
port: 80
spring:
rabbitmq:
host: 192.168.0.145
port: 5672
username: admin
password: admin
virtual-host: /
|
发送消息页面
命名为:sendInformationPage.html,内容如下:
1
2
3
4
5
6
7
8
9
10
11
12
13
| <!DOCTYPE html>
<html lang="en">
<head>
<meta charset="UTF-8">
<title>发送消息</title>
</head>
<body>
<form action="/sendInformation" method="post">
消息:<input type="text" name="information">
<input type="submit" value="发送">
</form>
</body>
</html>
|
RabbitMQ配置类
在rabbitmq-common模块下新建,命名为:RabbitMQConfig,内容如下:
1
2
3
4
5
6
7
8
9
10
11
12
13
14
15
16
17
18
19
20
21
22
23
24
25
26
27
28
29
30
31
32
33
34
35
36
37
38
39
40
41
42
43
44
45
46
47
48
49
50
51
52
53
54
55
56
57
58
59
60
61
62
| package com.ledao.common.config;
import org.springframework.amqp.core.Binding;
import org.springframework.amqp.core.BindingBuilder;
import org.springframework.amqp.core.DirectExchange;
import org.springframework.amqp.core.Queue;
import org.springframework.context.annotation.Bean;
import org.springframework.context.annotation.Configuration;
@Configuration
public class RabbitMQConfig {
public static final String DIRECT_EXCHANGE = "directExchange";
public static final String DIRECT_QUEUE = "directQueue";
public static final String DIRECT_ROUTINGKEY = "directRoutingKey";
@Bean
public DirectExchange directExchange() {
return new DirectExchange(DIRECT_EXCHANGE);
}
@Bean
public Queue directQueue() {
return new Queue(DIRECT_QUEUE);
}
@Bean
public Binding directBinding() {
return BindingBuilder.bind(directQueue()).to(directExchange()).with(DIRECT_ROUTINGKEY);
}
}
|
生产者Service接口
1
2
3
4
5
6
7
8
9
10
11
12
13
14
15
16
17
18
| package com.ledao.producer.service;
public interface RabbitMQProducerService {
void sendInformation(String information);
}
|
Service接口实现类
1
2
3
4
5
6
7
8
9
10
11
12
13
14
15
16
17
18
19
20
21
22
23
24
25
26
27
| package com.ledao.producer.service.impl;
import com.ledao.common.config.RabbitMQConfig;
import com.ledao.producer.service.RabbitMQProducerService;
import org.springframework.amqp.core.AmqpTemplate;
import org.springframework.stereotype.Service;
import javax.annotation.Resource;
@Service("rabbitMQProducerService")
public class RabbitMQProducerServiceImpl implements RabbitMQProducerService {
@Resource
private AmqpTemplate amqpTemplate;
@Override
public void sendInformation(String information) {
amqpTemplate.convertAndSend(RabbitMQConfig.DIRECT_EXCHANGE, RabbitMQConfig.DIRECT_ROUTINGKEY, information);
}
}
|
IndexController.java
1
2
3
4
5
6
7
8
9
10
11
12
13
14
15
16
17
18
19
20
21
22
23
24
25
26
27
28
29
30
31
32
33
34
35
36
37
38
39
40
41
42
43
44
45
46
| package com.ledao.producer.controller;
import com.ledao.producer.service.RabbitMQProducerService;
import org.springframework.stereotype.Controller;
import org.springframework.web.bind.annotation.RequestMapping;
import org.springframework.web.bind.annotation.ResponseBody;
import org.springframework.web.servlet.ModelAndView;
import javax.annotation.Resource;
@Controller
public class IndexController {
@Resource
private RabbitMQProducerService rabbitMQProducerService;
@RequestMapping("/toSendInformationPage")
public ModelAndView sendInformation() {
ModelAndView mav = new ModelAndView();
mav.setViewName("sendInformationPage");
return mav;
}
@ResponseBody
@RequestMapping("/sendInformation")
public String sendInformation(String information) {
rabbitMQProducerService.sendInformation(information);
return "发送消息到RabbitMQ成功<a href='/toSendInformationPage'><button>继续发送</button></a>";
}
}
|
测试
先启动rabbitmq-consumer模块再启动rabbitmq-producer模块,在浏览器地址栏输入:http://localhost/toSendInformationPage,输入消息后发送即可
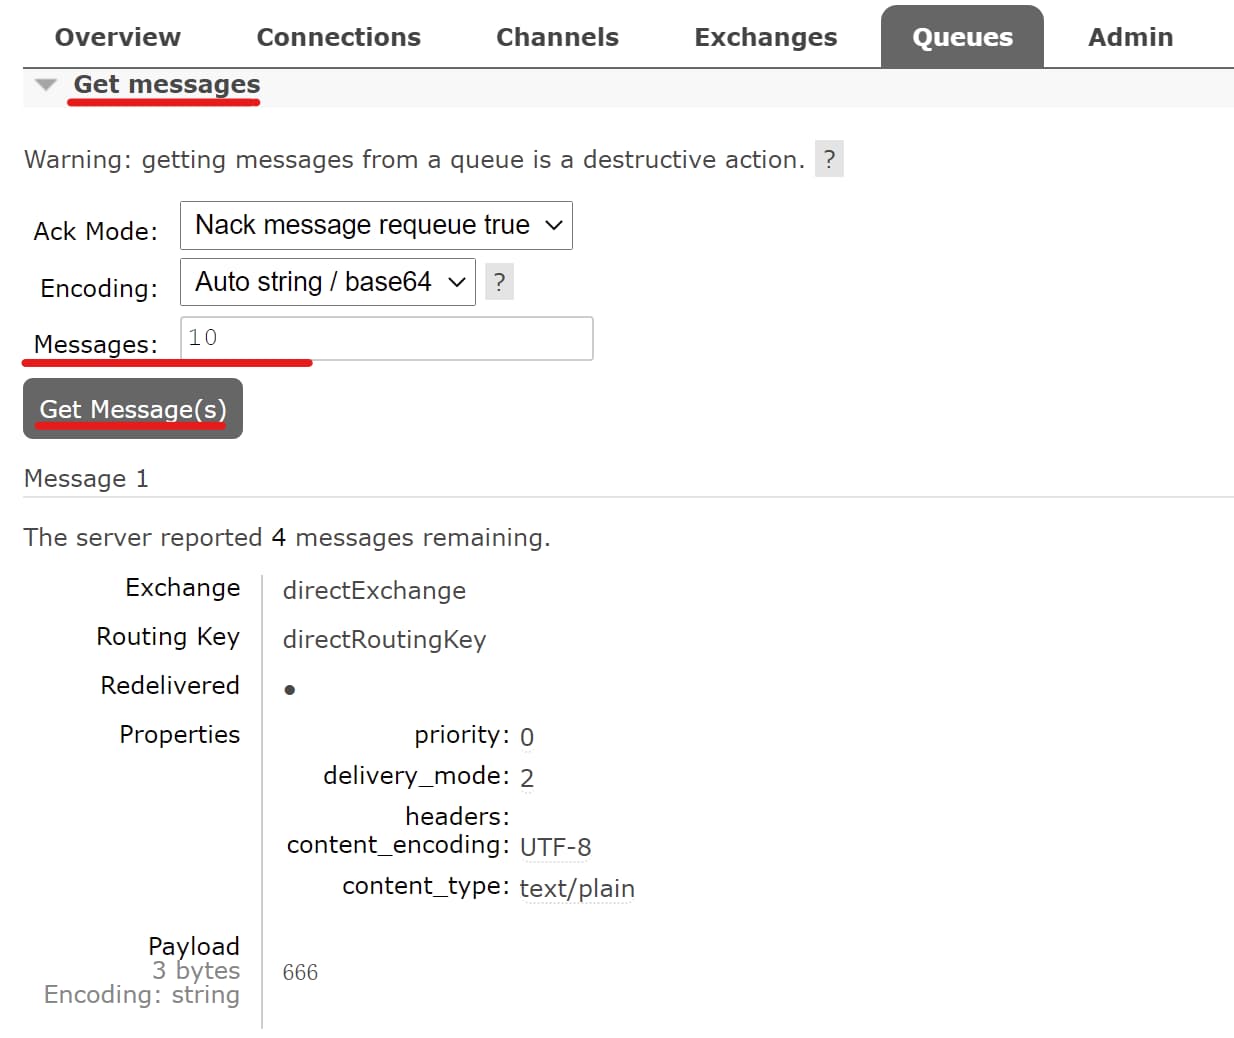
查看消息步骤:
在浏览器地址栏输入:http://虚拟机IP:15672,输入用户名和密码后进入RabbitMQ管理系统
点击Queues选项查看所有队列,点击directQueue进入队列内部去查看消息
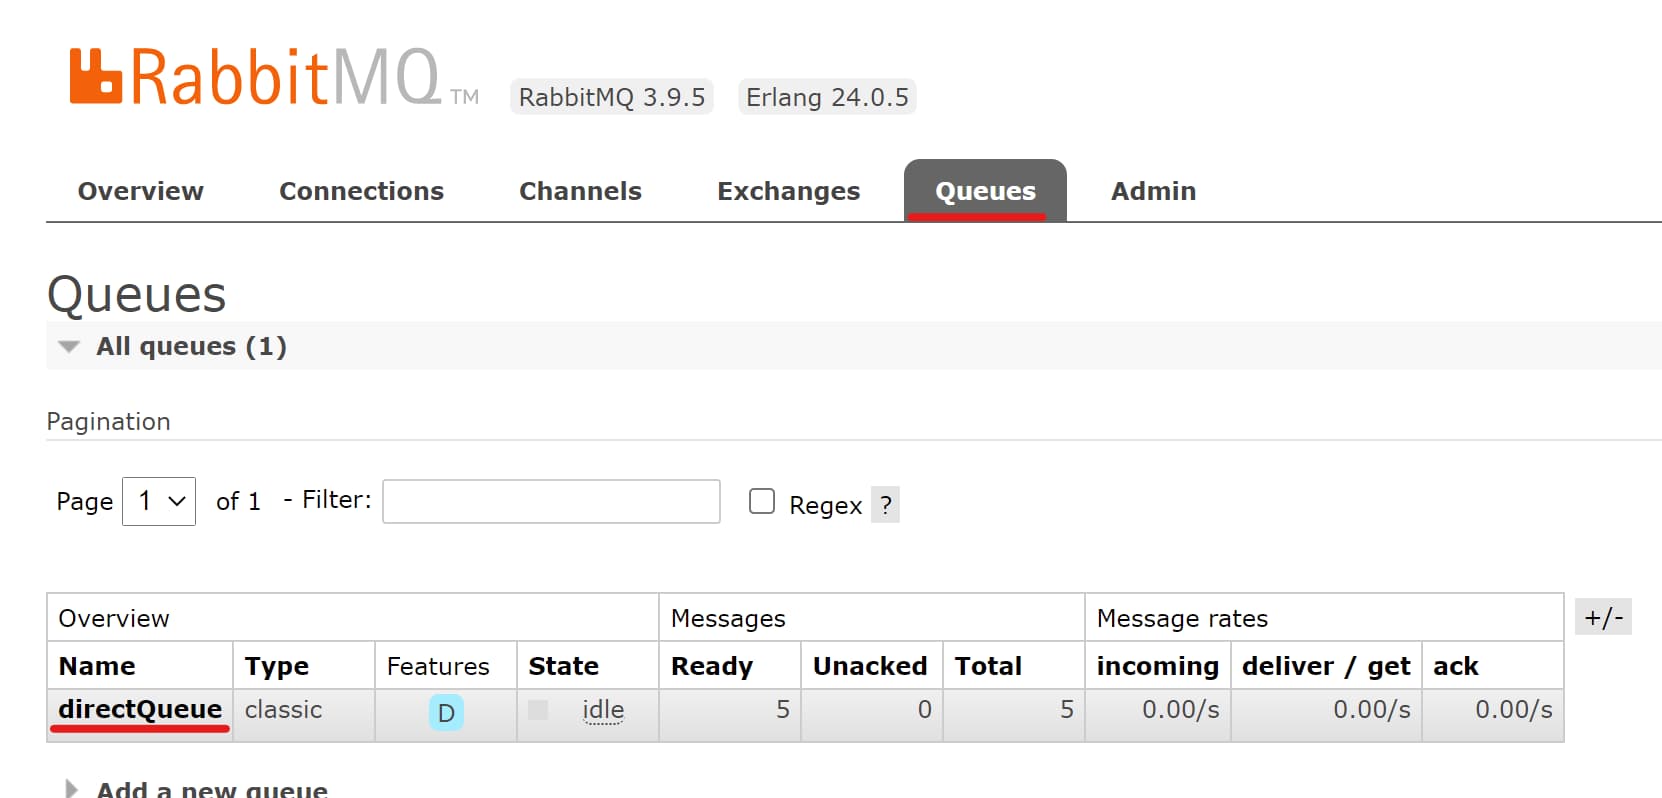
打开Get messages选项,在Messages文本框中输入查看消息的条数,点击Get Message(s)按钮即可查看消息